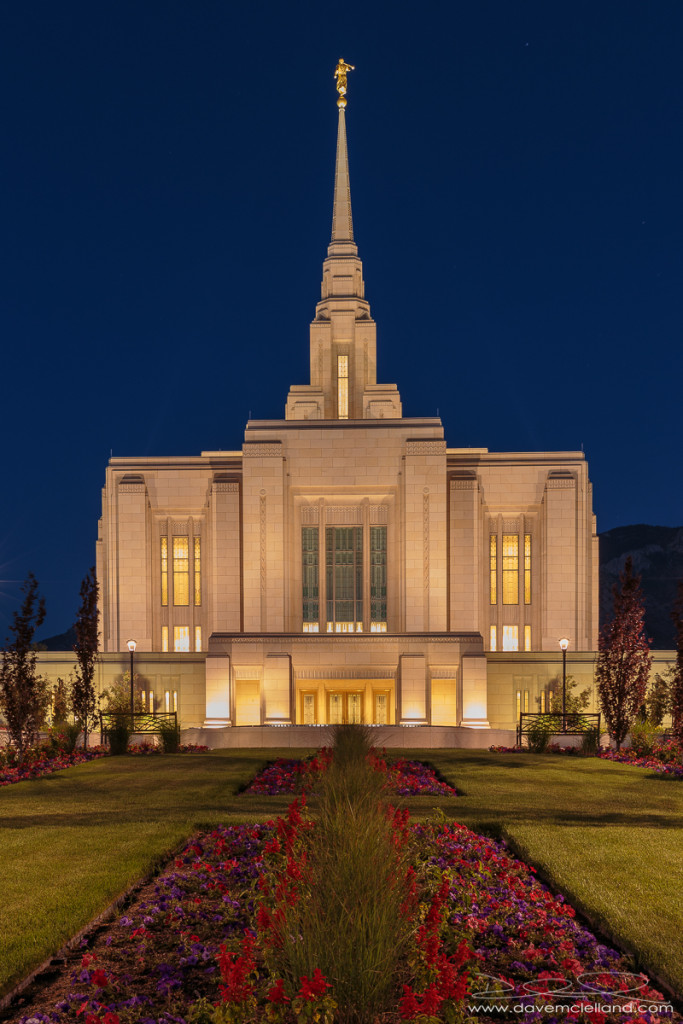
Have you ever wanted to learn to take better pictures at night? Here is the biggest secret: there is a very narrow window of opportunity for shooting amazing images of lit architecture at night called “The Blue Hour”. This is really a misnomer because it is not even close to an hour, but more like about 20-30 minutes where the sky is this amazing blue color from the suns light still illuminating the atmosphere after the sun has passed below the horizon. The blue hour happens approximately 15-30 minutes after the sun officially sets. Using an app on your smart phone you can calculate the time when this is expected to happen for any given day.
For this Teaching Point, I shot a picture of the Ogden, Utah LDS Temple:

Exposing at this time of night can be a little tricky. Be sure to watch your histogram and blinking highlights warning to make sure that your exposure is as close to the full range your sensor is capable of capturing. The key to watching your histogram is to make sure that you have a big range of tones almost all the way to the left, but make sure you are not clipping those important shadows. If your big range is near the middle of the histogram you are overexposed. At the same time you can expect to see some higlights being clipped as well – make sure it is a very small amount. Sometimes you need to be willing to sacrifice the shadows for the highlights since our viewers eyes are drawn to the brightest point of the image.
For this image I was shooting in Manual with the following settings:
- Camera: Canon EOS 6D
- Lens: Canon EF 40mm f/2.8 STM
- Shutter – 20 Seconds
- Aperture – f/11
- ISO – 100
- White Balance – Shade
- Focus – One-Shot (AF-Single) Center Point
- Flash – No
A tripod is absolutely essential when shooting at the edge of day/night since the shutter speeds required are quite long. A remote release is also highly recommended along with mirror lockup to ensure the sharpest image possible. I chose f/11 to maximize my depth of field without worrying about diffraction robbing any sharpness. With full frame cameras you can typically shot at f/11 to f/16 while on APS-C cameras f/8-f/11 is the guideline. I selected ISO 100 for maximum image quality. Higher ISO’s induce noise which reduces the sharpness and detail of the image. I chose shady for the white balance since the color is very blue and it warms it up a tad, however, because I shot this in RAW I was able to make adjustments in post and opted for a more blue image and set my white balance to 4500K with a +18 Magenta Tint in Lightroom. I used the center focusing point which was on the large window above the doors to ensure that the temple would be in excellent focus. No flash was used since the range of the flash is limited and would not reach the temple and overexpose the flowers in the foreground. I debated using a flash but there were some path lights that provided enough illumination to the flowers and appear more even an natural in the final image.
Once the image was imported into lightroom I made some basic adjustments for Whitebalance, Highlights, Shadows, White and Black Points. I also added some clarity and vibrance. I then made some additional targeted adjustments on the HSL (Hue/Saturatoin/Lumincance) controls: darkening the blue sky with the luminance and toning down the saturation on the blue as well. I also applied sharpening but adjusted the sharpening mask to ensure that I was not sharpening the small amount of noise in the sky. I also applied lens corrections and used the Upright controls to correct the perspective distortion that happens when a camera is tilted back. I was sure to minimize the tilt as much as possible so that I could maintain as many pixels as possible. I did have to make some additional adjustments as Lightroom was close, but not quite right on the perspective correction.
Is that a lot of post processing work? Yes! Is it worth it? Absolutely! As mentioned in the post “Taking the photo is the first step“, post processing can really help to make or break your images. Be sure to plan on at least some post processing after the fact.

