When I first started using a DSLR I was disappointed with my results. I was used to shooting slide film where everything had to be just right at the time of capture since the slide was the final result. When I started using a DSLR I felt like I was always tweaking my images. I had heard the quote by Ansel at the beginning of this article before, but it wasn’t until recently that it “clicked” (pun not intended); Taking the picture is the first step and that the truly great photos need additional post processing. As good as Ansel was as a photographer, it was what he did in the darkroom that made him truly great. To that end, he co-developed what is known as the “Zone System” as a way of determining the exposure settings based on what he planned to do with the image in the darkroom later.
The negative is comparable to the composer’s score and the print to its performance.
– Ansel Adams
To illustrate, look at this image:
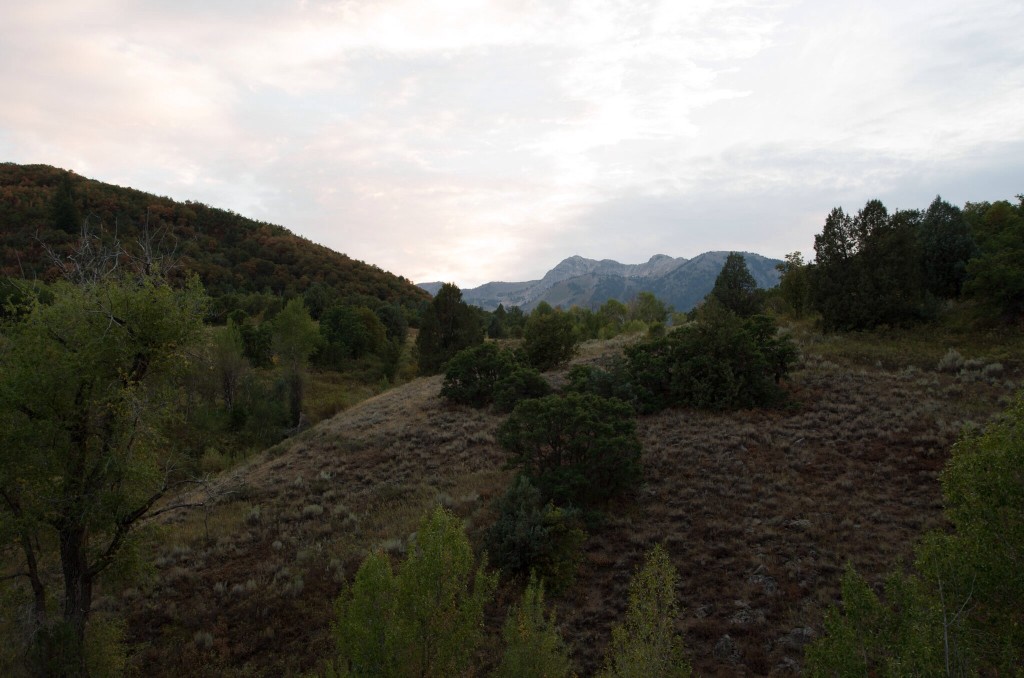
Most photographers would delete this picture. This is what the camera suggested as a correct exposure. However, after consulting the blinking highlights, blinking shadows (I wish EVERY camera had this feature) and histogram, I took another picture, but underexposed it by 2 stops to retain the important highlight detail in the sky:
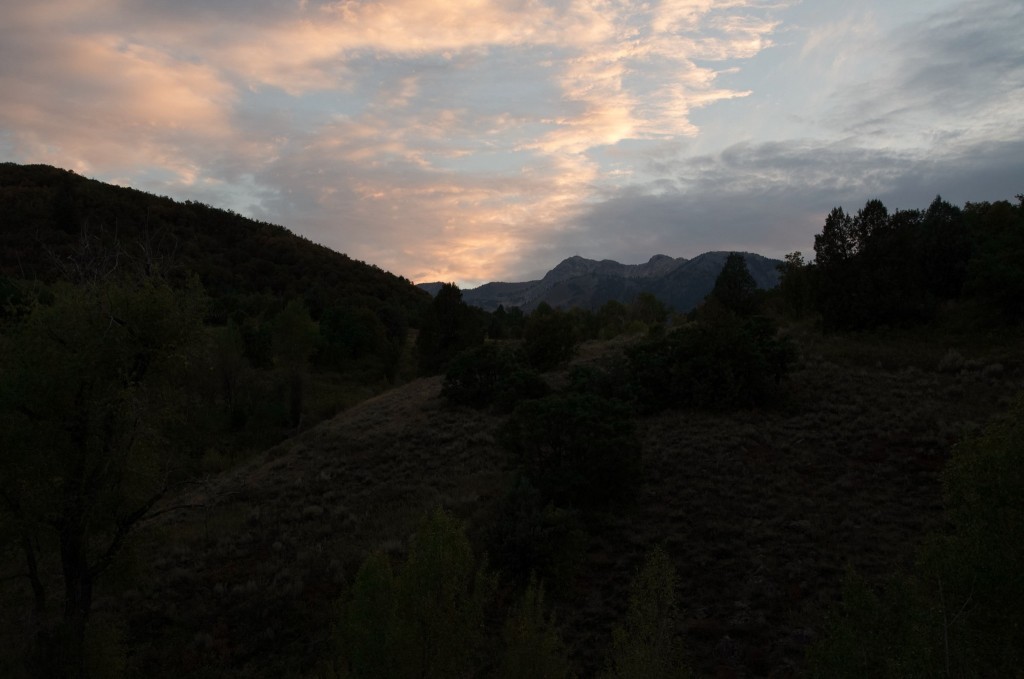
This is an exposure technique known as “Expose to the Right” (ETTR) and I will discuss it in a future tip. The sky looks a lot better, but now the foreground is very dark. This is fine because the sky is the brightest detail I want to capture and by using Adobe Lightroom, I can make some adjustments to the shadow detail. After shooting this image, I again consulted the Histogram, blinking highlights and blinking shadows and confirmed that there was not much detail lost in the brightest and darkest regions of the image. This exposure fits within the confines of the sensors dynamic range.
For editing this example I am using the new Lightroom mobile app on an iPad. The image was downloaded to my main PC and then synced to the mobile device. Additionally, you can also download JPEG images into the picture folder using the iPad Camera Connection kit SD card reader and then import them into Lightroom from the camera roll using the app.
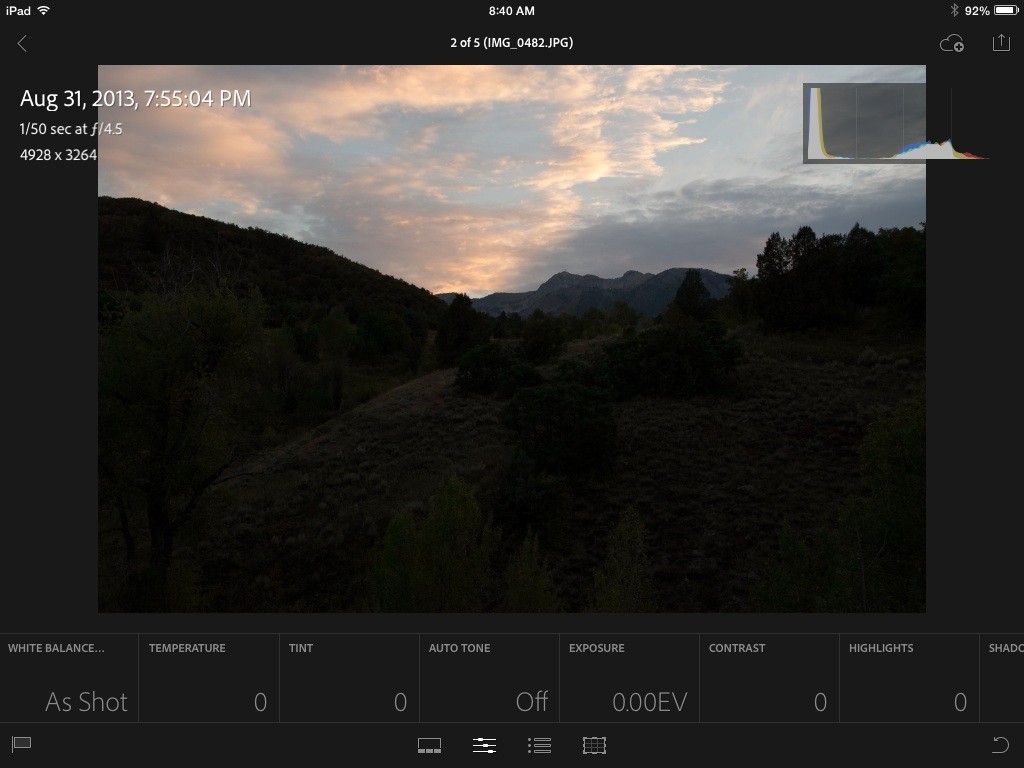
After the image is imported I make “global” adjustments. I typically start with exposure. For this image I increased the exposure to 2 stops over exposed. This causes the photo to look just like what the camera originally metered, however, by doing it this way I have retained the highlight detail that I can get back in a later step. Had I used the original metered shot, that highlight detail is already gone and can not be recovered.
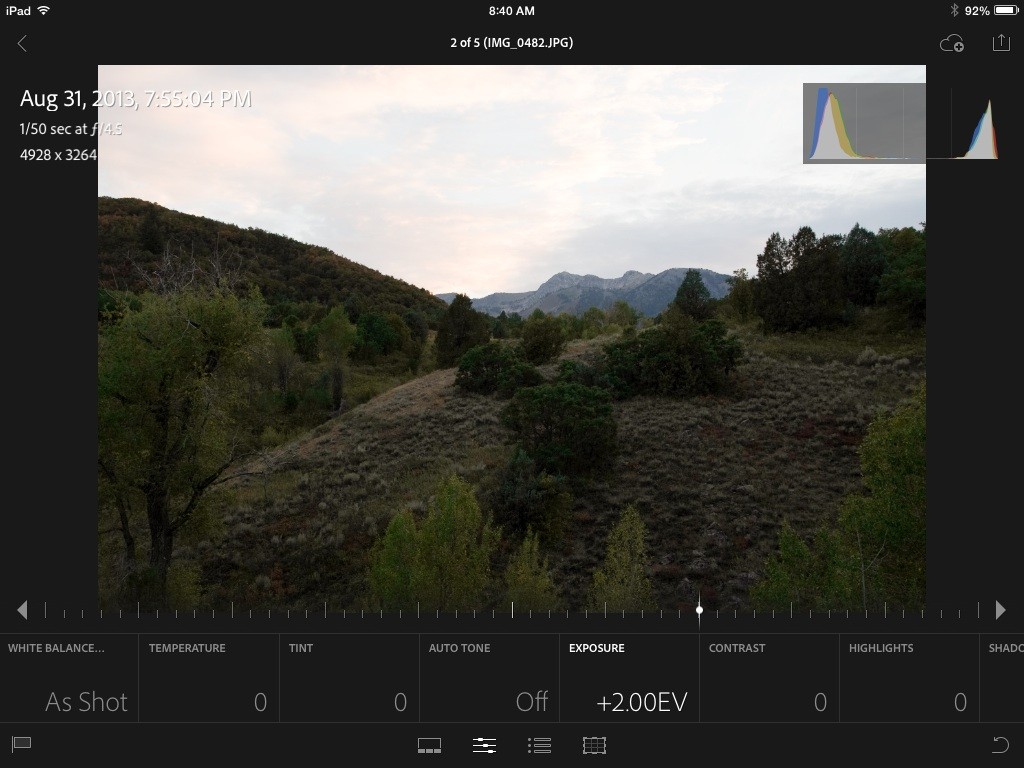
The next step is to adjust the white balance if needed. I strive to get this right in the camera at the time of the exposure using either the presets or a graycard with the custom white balance setting. The color of the image is ok, so I am going to skip this step for now. However, I may revisit this later after some other adjustments are made.
Now that the global adjustments are done, it is time to start on the targeted adjustments. The first step is to recover the sky detail by using the “highlights” slider in Lightroom:
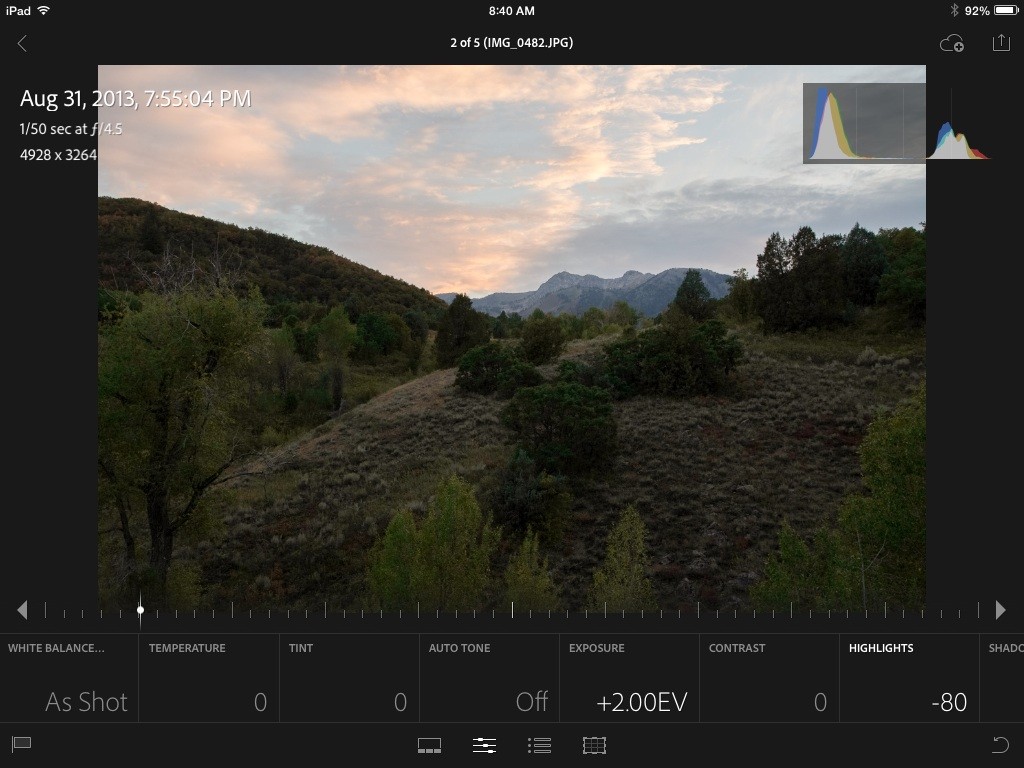
Already you can see a pretty good improvement in the picture, but the foreground is still a little dark. By applying an adjustment to the shadows, we can make them lighter:
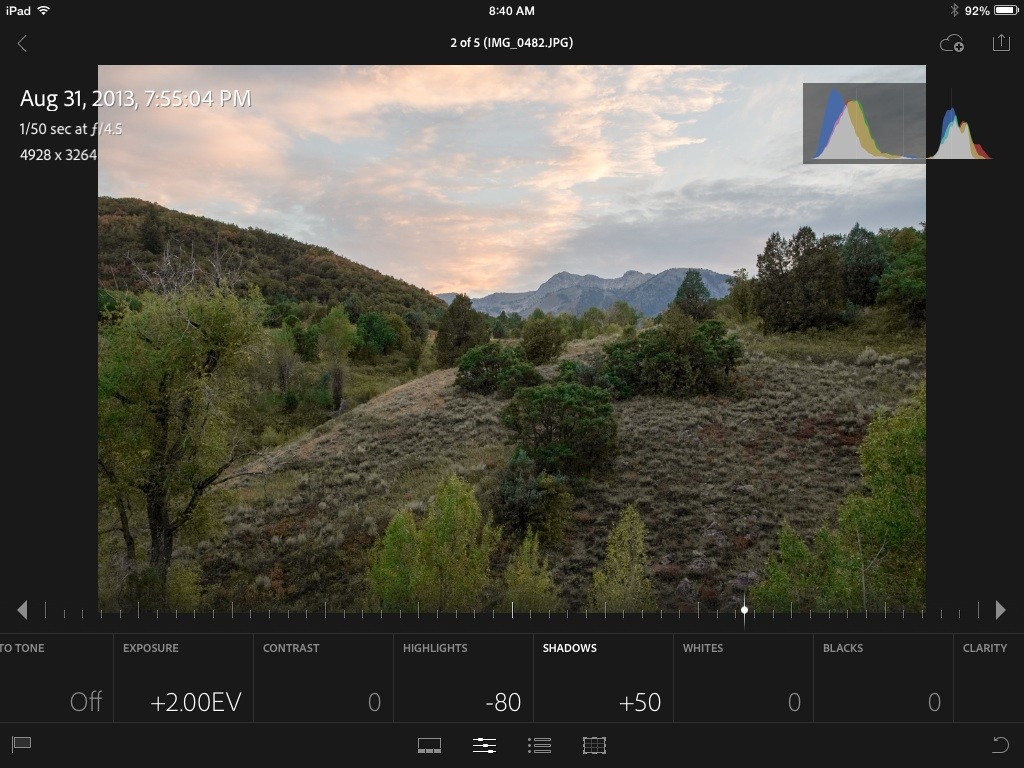
Now that we have our exposure balanced for the highlights and the shadows, we can apply the additional “seasoning”. With these controls you want to be careful and not add too much or else it can ruin your photo. Here I have started with the clarity slider. Clarity adds an edge contrast to give the appearance of sharpening. Too much clarity will give unique appearance that can look great in some images, and terrible in others. As the old saying goes, season to taste:
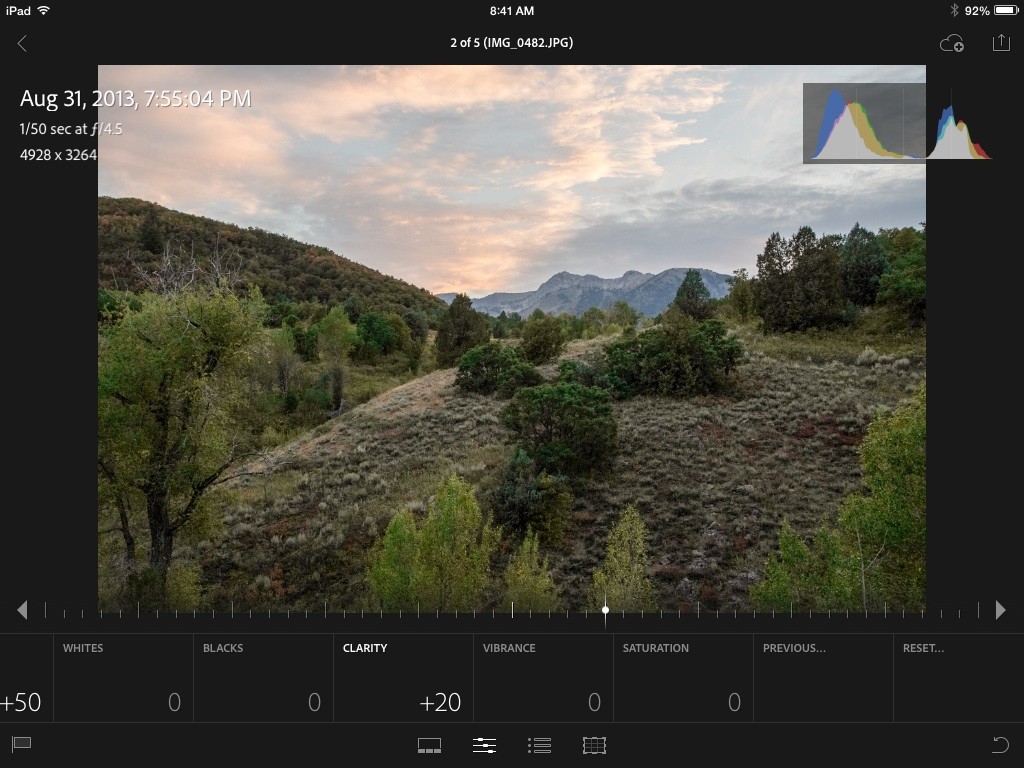
And finally I like my colors to have a little more “punch”, so I add a little vibrance. Vibrance is different from saturation as it applies the changes using a different algorithm. I tend to prefer Vibrance, but the nice thing about Lightroom is you can always try each and go back and forth until you are happy with the final result.

As nice as it would be for the camera to be able to produce the final image you see here, that would take away from the artistic vision. The secret is not to use the same settings on every image. Each image is different and should be treated individually. Learn what the limits of the camera are and then learn what can be done in post processing. This only comes with practice. Besides, all images would appear similar and only reflect the engineers vision based on lab data and not real world situations.
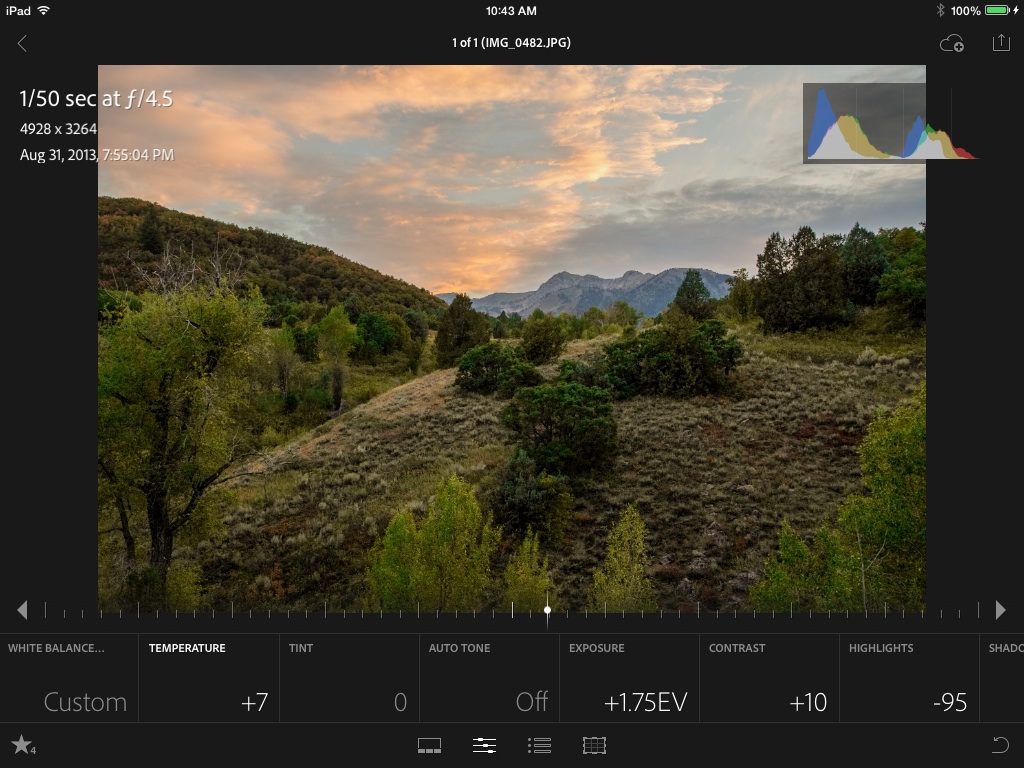
Here is the final image after some additional adjustments, which is part of the process. When you make a change it may impact some of the other changes. It is a constant back and forth until you get the image “just right”:

I made some minor adjustments to the above changes, plus I bumped up the blacks, lowered the whites, increased the contrast and adjusted the white balance slightly warmer. All in all the Process took me about 10 minutes to go from the initial image to the final image above. If you have not processed your images I would highly encourage you to try it, you might be surprised at the results.

