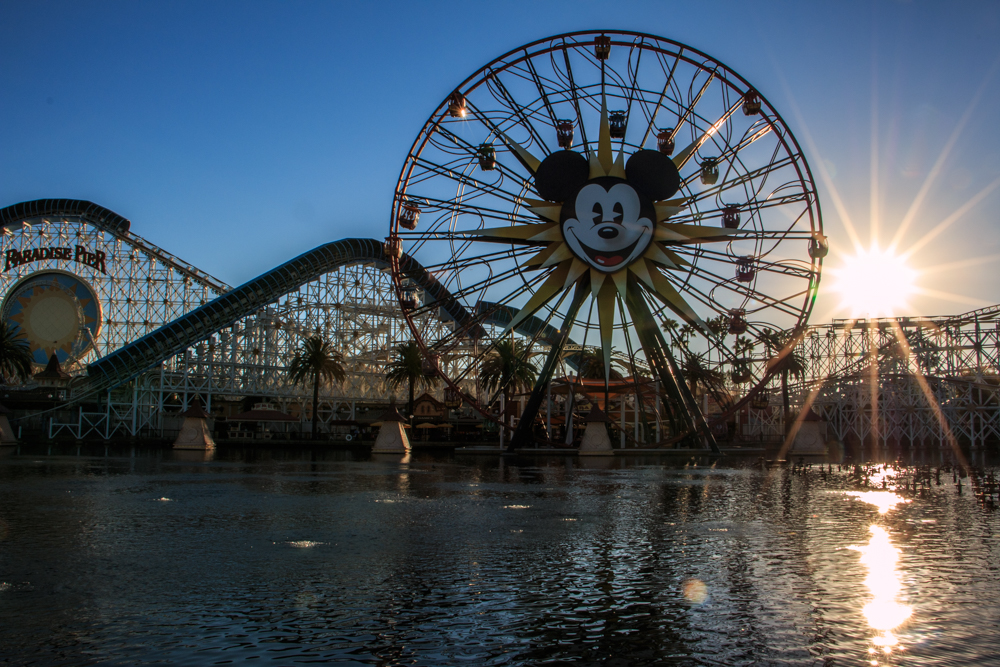
After my wife and I returned from our Disneyland vacation one of the images I shared on social media prompted a lot of “how did you do that” questions. A perfect opportunity for another teaching point. In this post I will show you how to make a sunburst without using Photoshop or other software.

I love this angle at Disney’s California Adventure with the rollercoaster and the giant Mickey Wheel in the middle ground and the water in the foreground. The secret to the sunburst is to stop down your aperture to f/16 – f/22. This smaller aperture will also give you maximum depth of field which works to our advantage as well. Here are the camera settings for the shot:
- Camera: Canon EOS 70D
- Lens: Canon EF-S 18-135mm f/3.5-5.6 IS STM
- Mode: Aperture Priority
- Shutter speed: 1/100 sec
- Aperture: f/20
- ISO: 100
Warning! Composing with the sun in your viewfinder is very dangerous! Do not look directly at the sun as the viewfinder will magnify the intensity of light and can cause blindness. I was very careful to not look at the sun, but instead to focus my attention on the middle ground elements.
This image did require some post processing since the brightness of the sun and the darkness of the foreground were pushing the limits of the sensor. I did shoot this in RAW to ensure I would have as much info as possible and retain more highlight and shadow detail to work with in post processing. In lightroom I adjusted the exposure, shadows, highlights, clarity, Vibrance and sharpening. This enabled me to show more of the starburst detail and lighten the foreground and middle ground shadows to bring out the color and detail there. Here is what the original image looked like straight out of the camera:


